Correcting Features Captured with an Approximate Base Position - ArcGIS Pro
The approximate base position workflow is useful for capturing data quickly in a location with no known positions. It allows you to collect field data during the base RINEX data collection, saving the time usually required to set a known base position.
Overview of Field Data Collection
- Set up the base station at the data collection site
- Set an approximate position using the FastRTK web interface and note the coordinate used
- Start RINEX data collection and let it run for the duration of field data collection (minimum 2 hours)
- Capture the field data
[Understanding the Result]
The resulting data has the precision of RTK but is not accurate to the datum. In other words, the data is shifted by an unknown direction and distance—usually ~2 meters in any direction. All points will be shifted by the same direction and distance.
Correcting the Data
The data needs to be shifted in the direction and distance between the approximate coordinate and the post-processed coordinate.
Step 1: Create CSV File with Base Coordinates
- Download the RINEX data file from the base station
- Submit to OPUS or another post-processing service
- Create a new Excel or CSV file with the following headers:
Name,Latitude,Longitude,Altitude
- Insert the approximate base position into the first row
- Insert the post-processed coordinate into the second row
Example CSV:
| Name | Latitude | Longitude | Altitude |
|---|---|---|---|
| Approximate | 45.00000000 | -122.00000000 | 25.000 |
| Processed | 45.00001234 | -122.00001234 | 25.123 |
Step 2: Add CSV File to ArcGIS Pro Map
Create a new ArcGIS Pro project
Click on the Map tab
Click the down arrow below the Add Data button
Select XY Point Data
Set the Input Table to the CSV file generated in Step 1
The X Field and Y Field should automatically be selected as Longitude and Latitude
Set the coordinate system to GCS_NAD_1983_2011
:::note This is correct for the majority of data collection in the United States. :::
Click Run
Step 3: Add Field Data to the Map
- Click on the Map tab
- Click the Add Data button
- Select your GIS dataset captured in the field using the base station (the rover data)
- Add it to the map
Step 4: Shift the Data
There are multiple ways to shift data in ArcGIS Pro. We'll use the Move tool.
Using the Select tool in the Map tab (under the Selection section), click and drag a selection box around all of the points to be shifted
Add the approximate base coordinate point to the selection by holding the Shift key and selecting it
Zoom into the 2 base coordinates
Click and drag the approximate base point and snap it to the post-processed base point
All of the selected points will be shifted in the same direction and distance. The data is now corrected and accurate to the NAD 1983 (2011) datum.
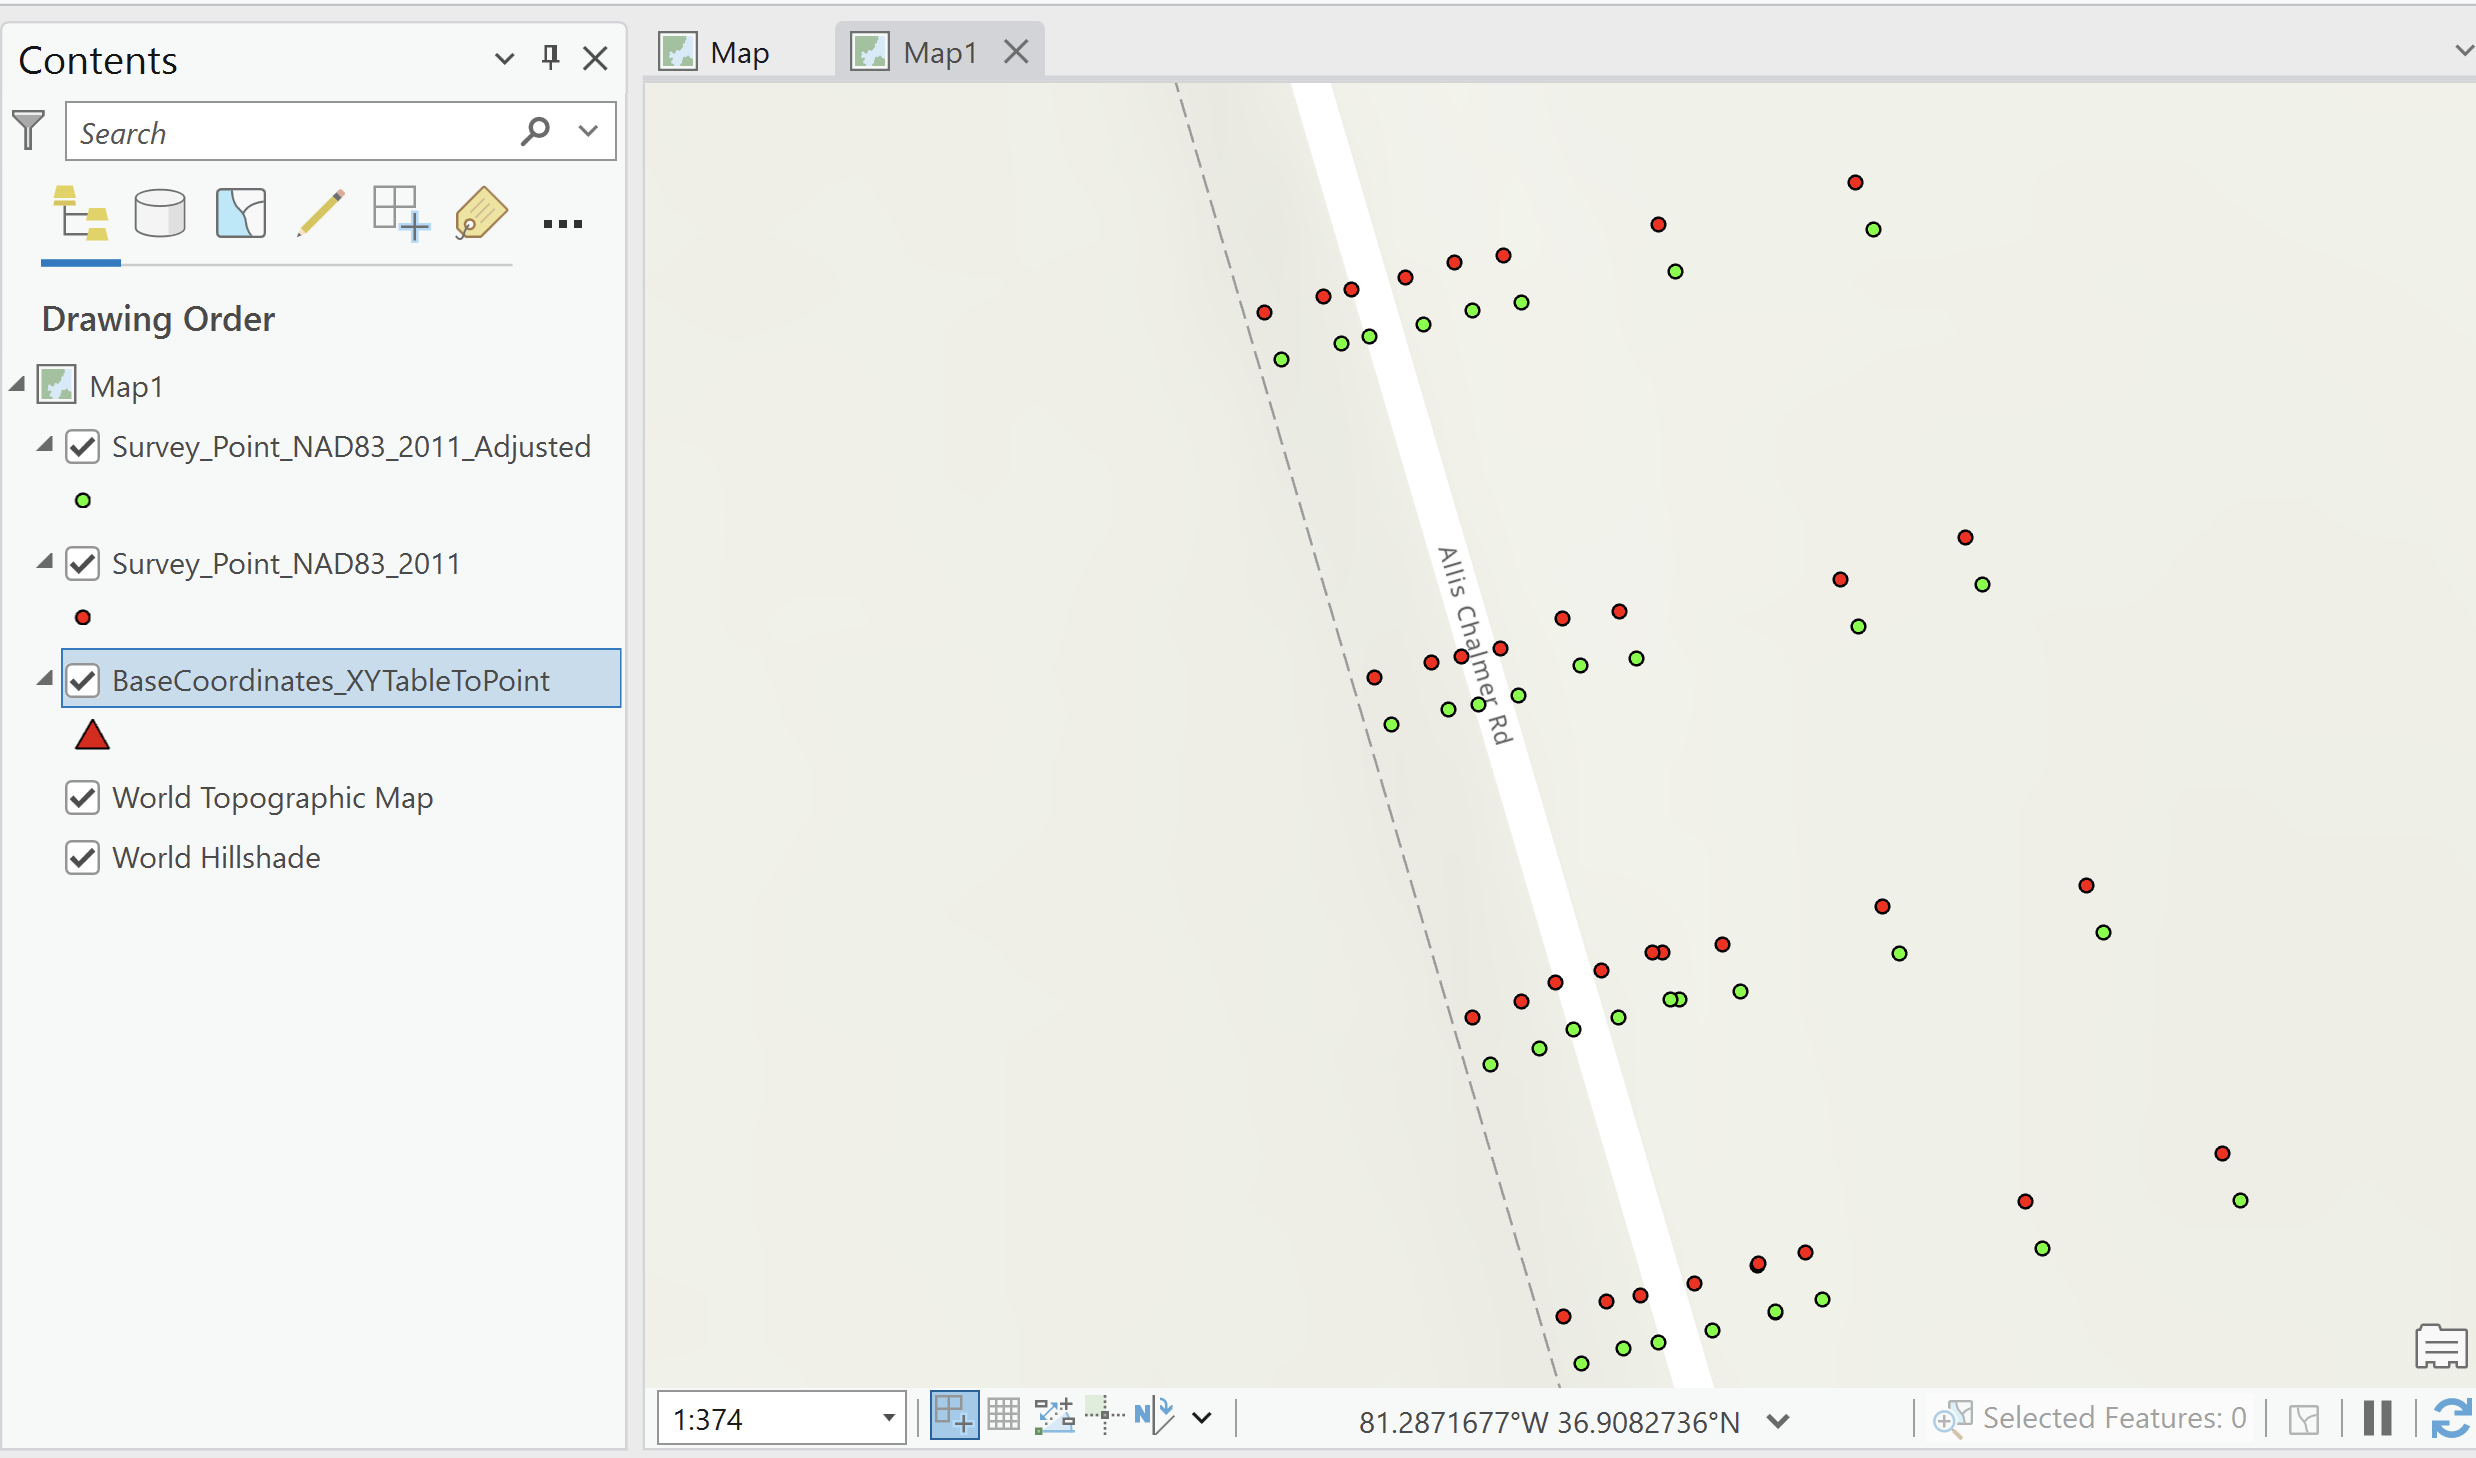
Visual Reference
The screenshot below shows:
- Red points - Survey points captured with approximate base position (NAD83_2011)
- Green points - Survey points after adjustment (NAD83_2011_Adjusted)
- Red triangle - The approximate base coordinate (BaseCoordinates_XYTableToPoint)
After the shift operation, all red points will align with their corresponding green positions.
Tips for Best Results
| Tip | Description |
|---|---|
| RINEX duration | Collect at least 2 hours of RINEX data for reliable post-processing |
| Note coordinates | Always record the approximate coordinates used before starting data collection |
| Same session | All data collected in the same session will have the same offset |
| Backup data | Save a copy of your original data before performing the shift |
Alternative Methods
While the Move tool is the simplest approach, you can also correct data using:
- Spatial Adjustment tools - For more complex transformations
- Calculate Geometry - Apply coordinate offsets mathematically
- Python scripting - Batch process multiple datasets
[Related Documentation]
- RINEX Data Logging - How to enable and download RINEX files
- Setting Base Coordinates - Methods for establishing base position